|
TOP
|
NEWS
|
Profile
|
MY VW GOLFⅡ
|
Friends' Rides
|
Gallery
|
BBS
|
LINKS
|
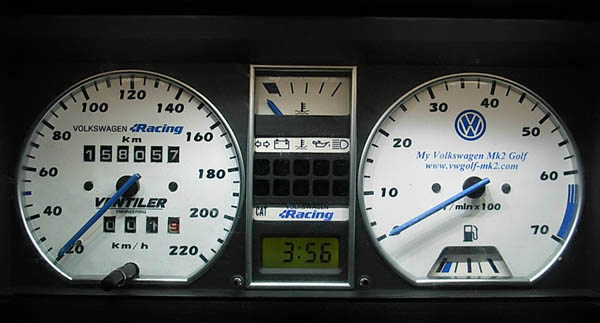
White Gauge on with White LED and Rings ver. 2
VW ゴルフⅡ ホワイトメーター (LED / メータリング) ver. 2
以前の白色LED搭載ホワイトメーターパネルを再度作成し直しました。
今回写真はあまり撮影出来ていないので、メータ分解等の詳細は
以前のページ
をご覧ください。。
今回もホワイトメーターシートはパパ@相模原さんに作成してもらいました。(ありがとうございます!)
以前のバージョンとの違いはURLの部分だけです。(^^;(お手数をお掛けしました!)
また別途メーターリングを入手し、こちらも装着します。
メーターシートはそれぞれキレイにカットして貼り付けます。
それらを組み上げます。
メーターリングに関しては2つのリングははめ込むだけです。中心の長方形の枠は両面テープで貼り付けます。
以上、完成です。(^^;
昼の状態です。
(時計の時間がめちゃくちゃなのは許してください(^^;)
夜の状態です。
(メータの照明はLEDにしても調整可能です。)
フォルクスワーゲンゴルフⅡ(アーバン君 )のホワイトメーター with LED ver. 2